Sync & dashboard
Sync and dashboard.
What you'll actually do once Spent is installed — sync, browse, re-categorize, sleep.
The dashboard
Section titled “The dashboard”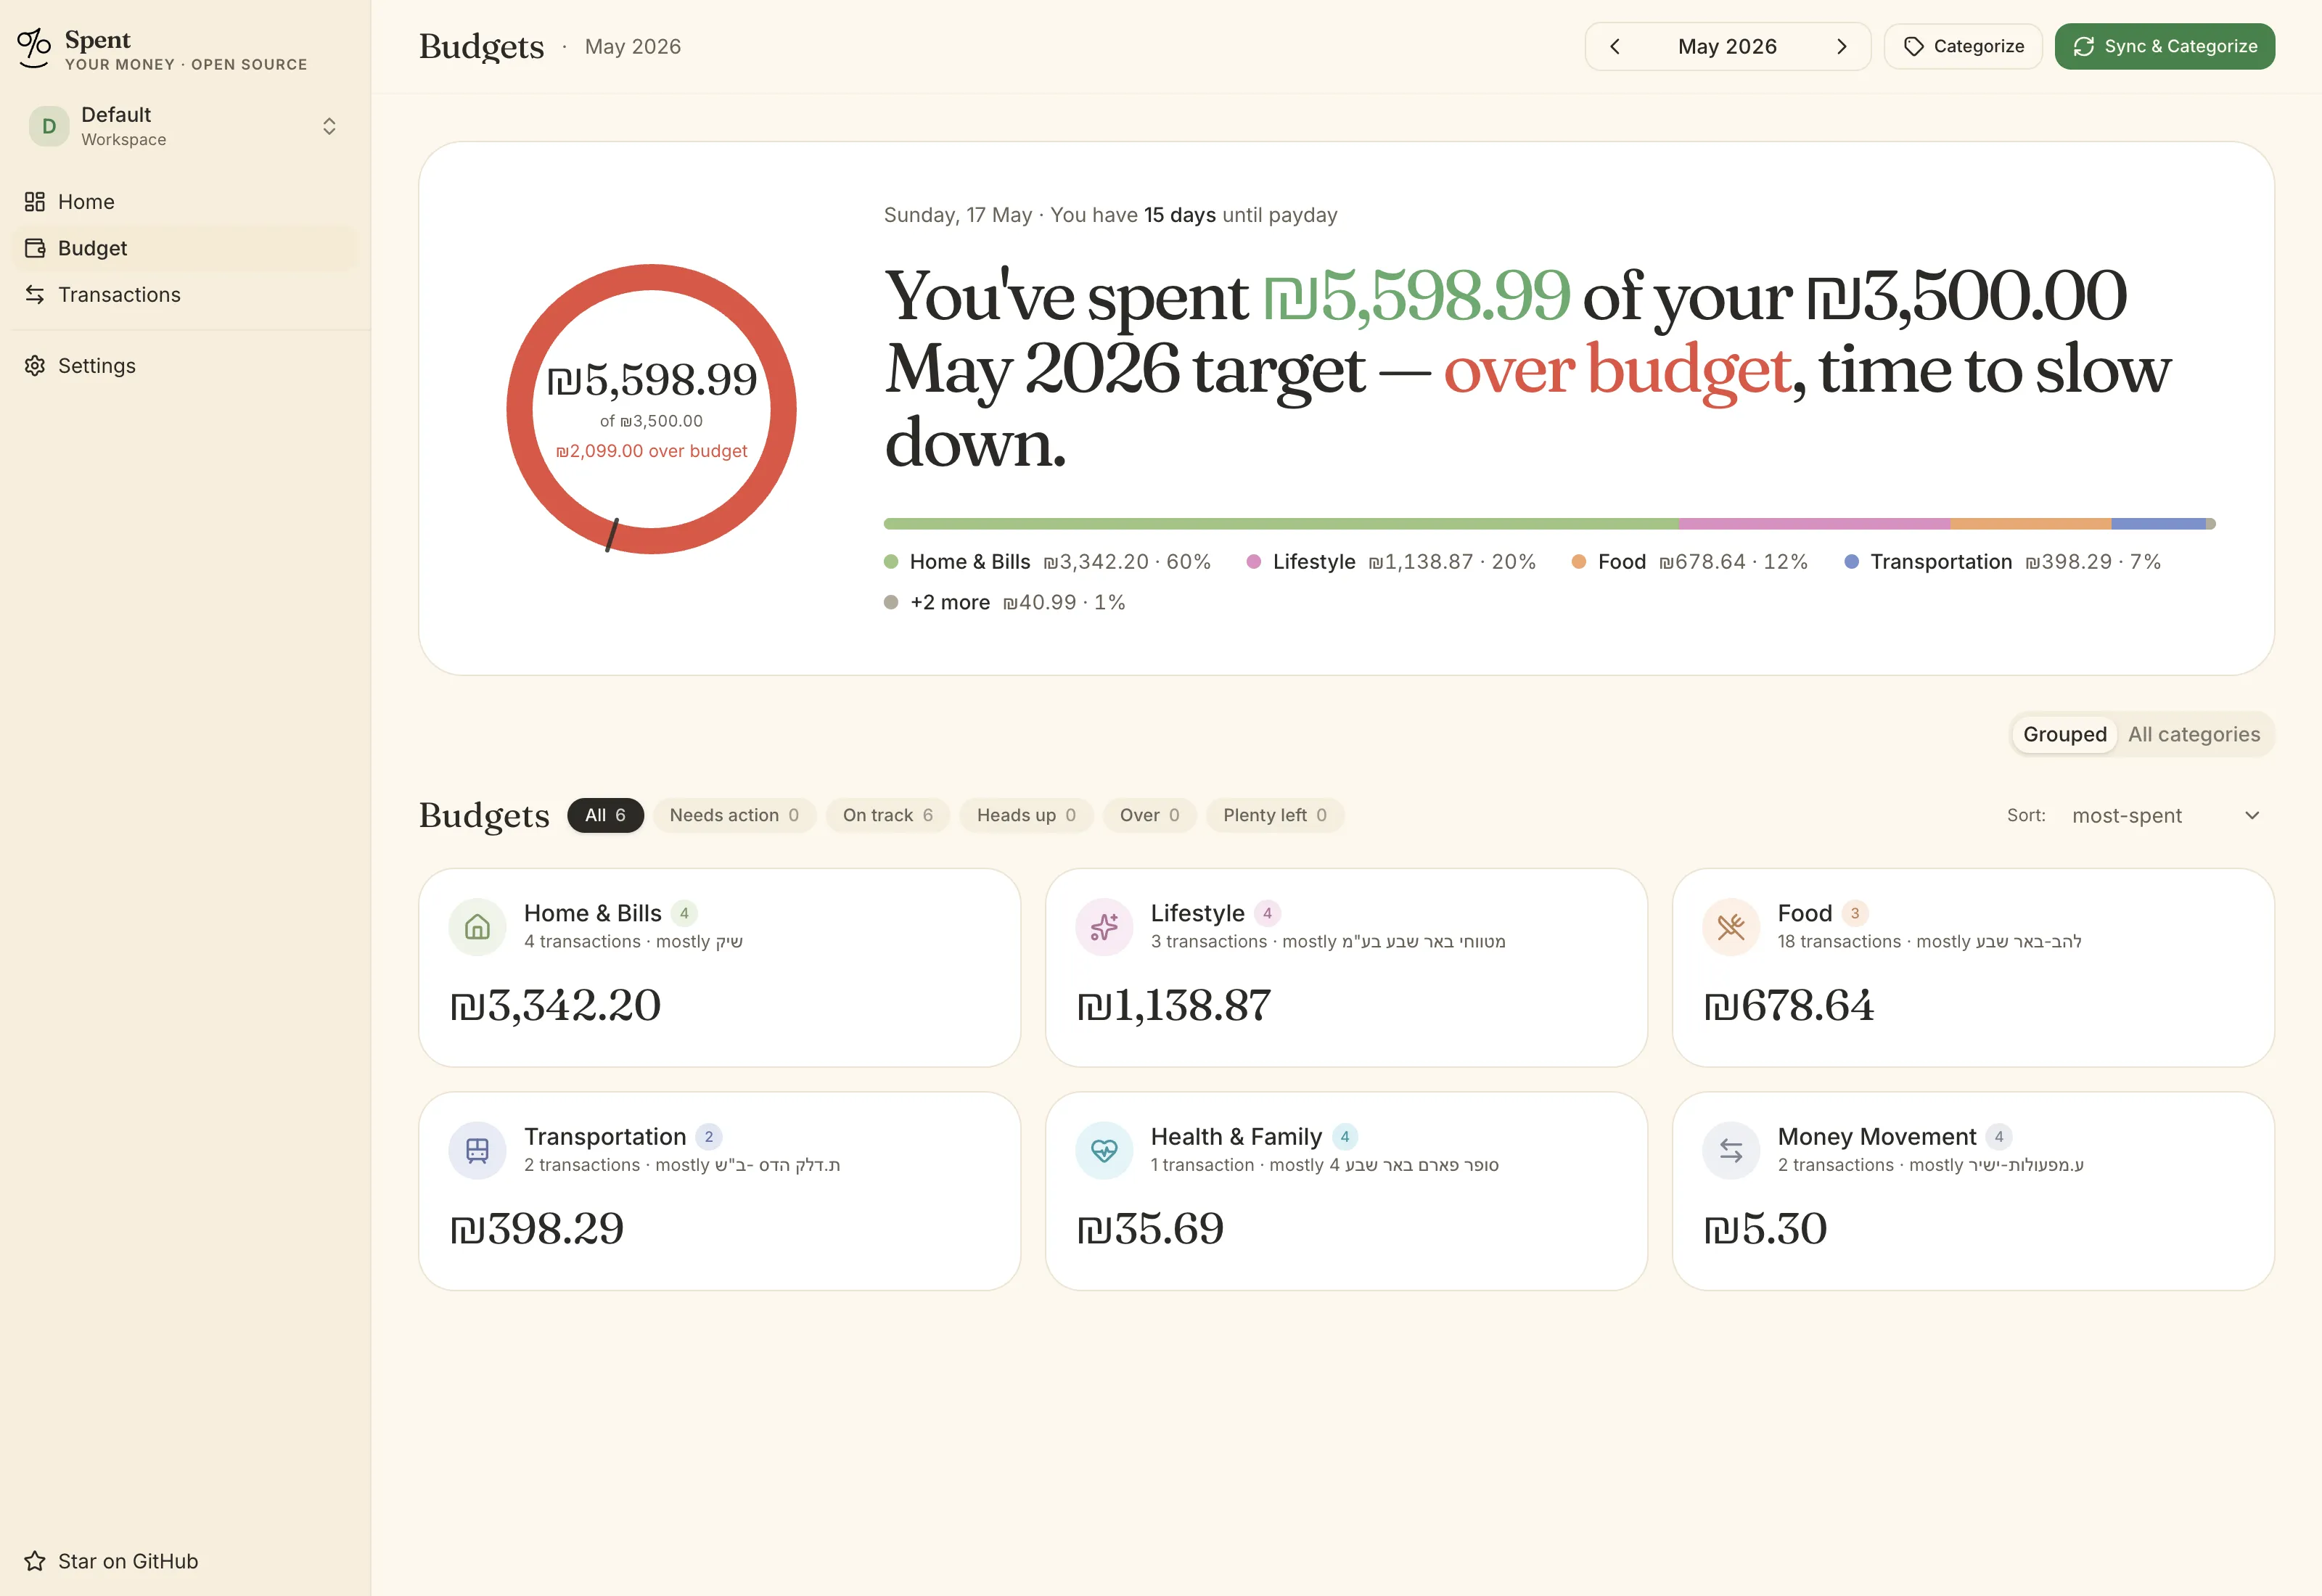
Visit http://localhost:41234 (or http://spent.local:41234 if you added the hosts entry). The dashboard has four areas:
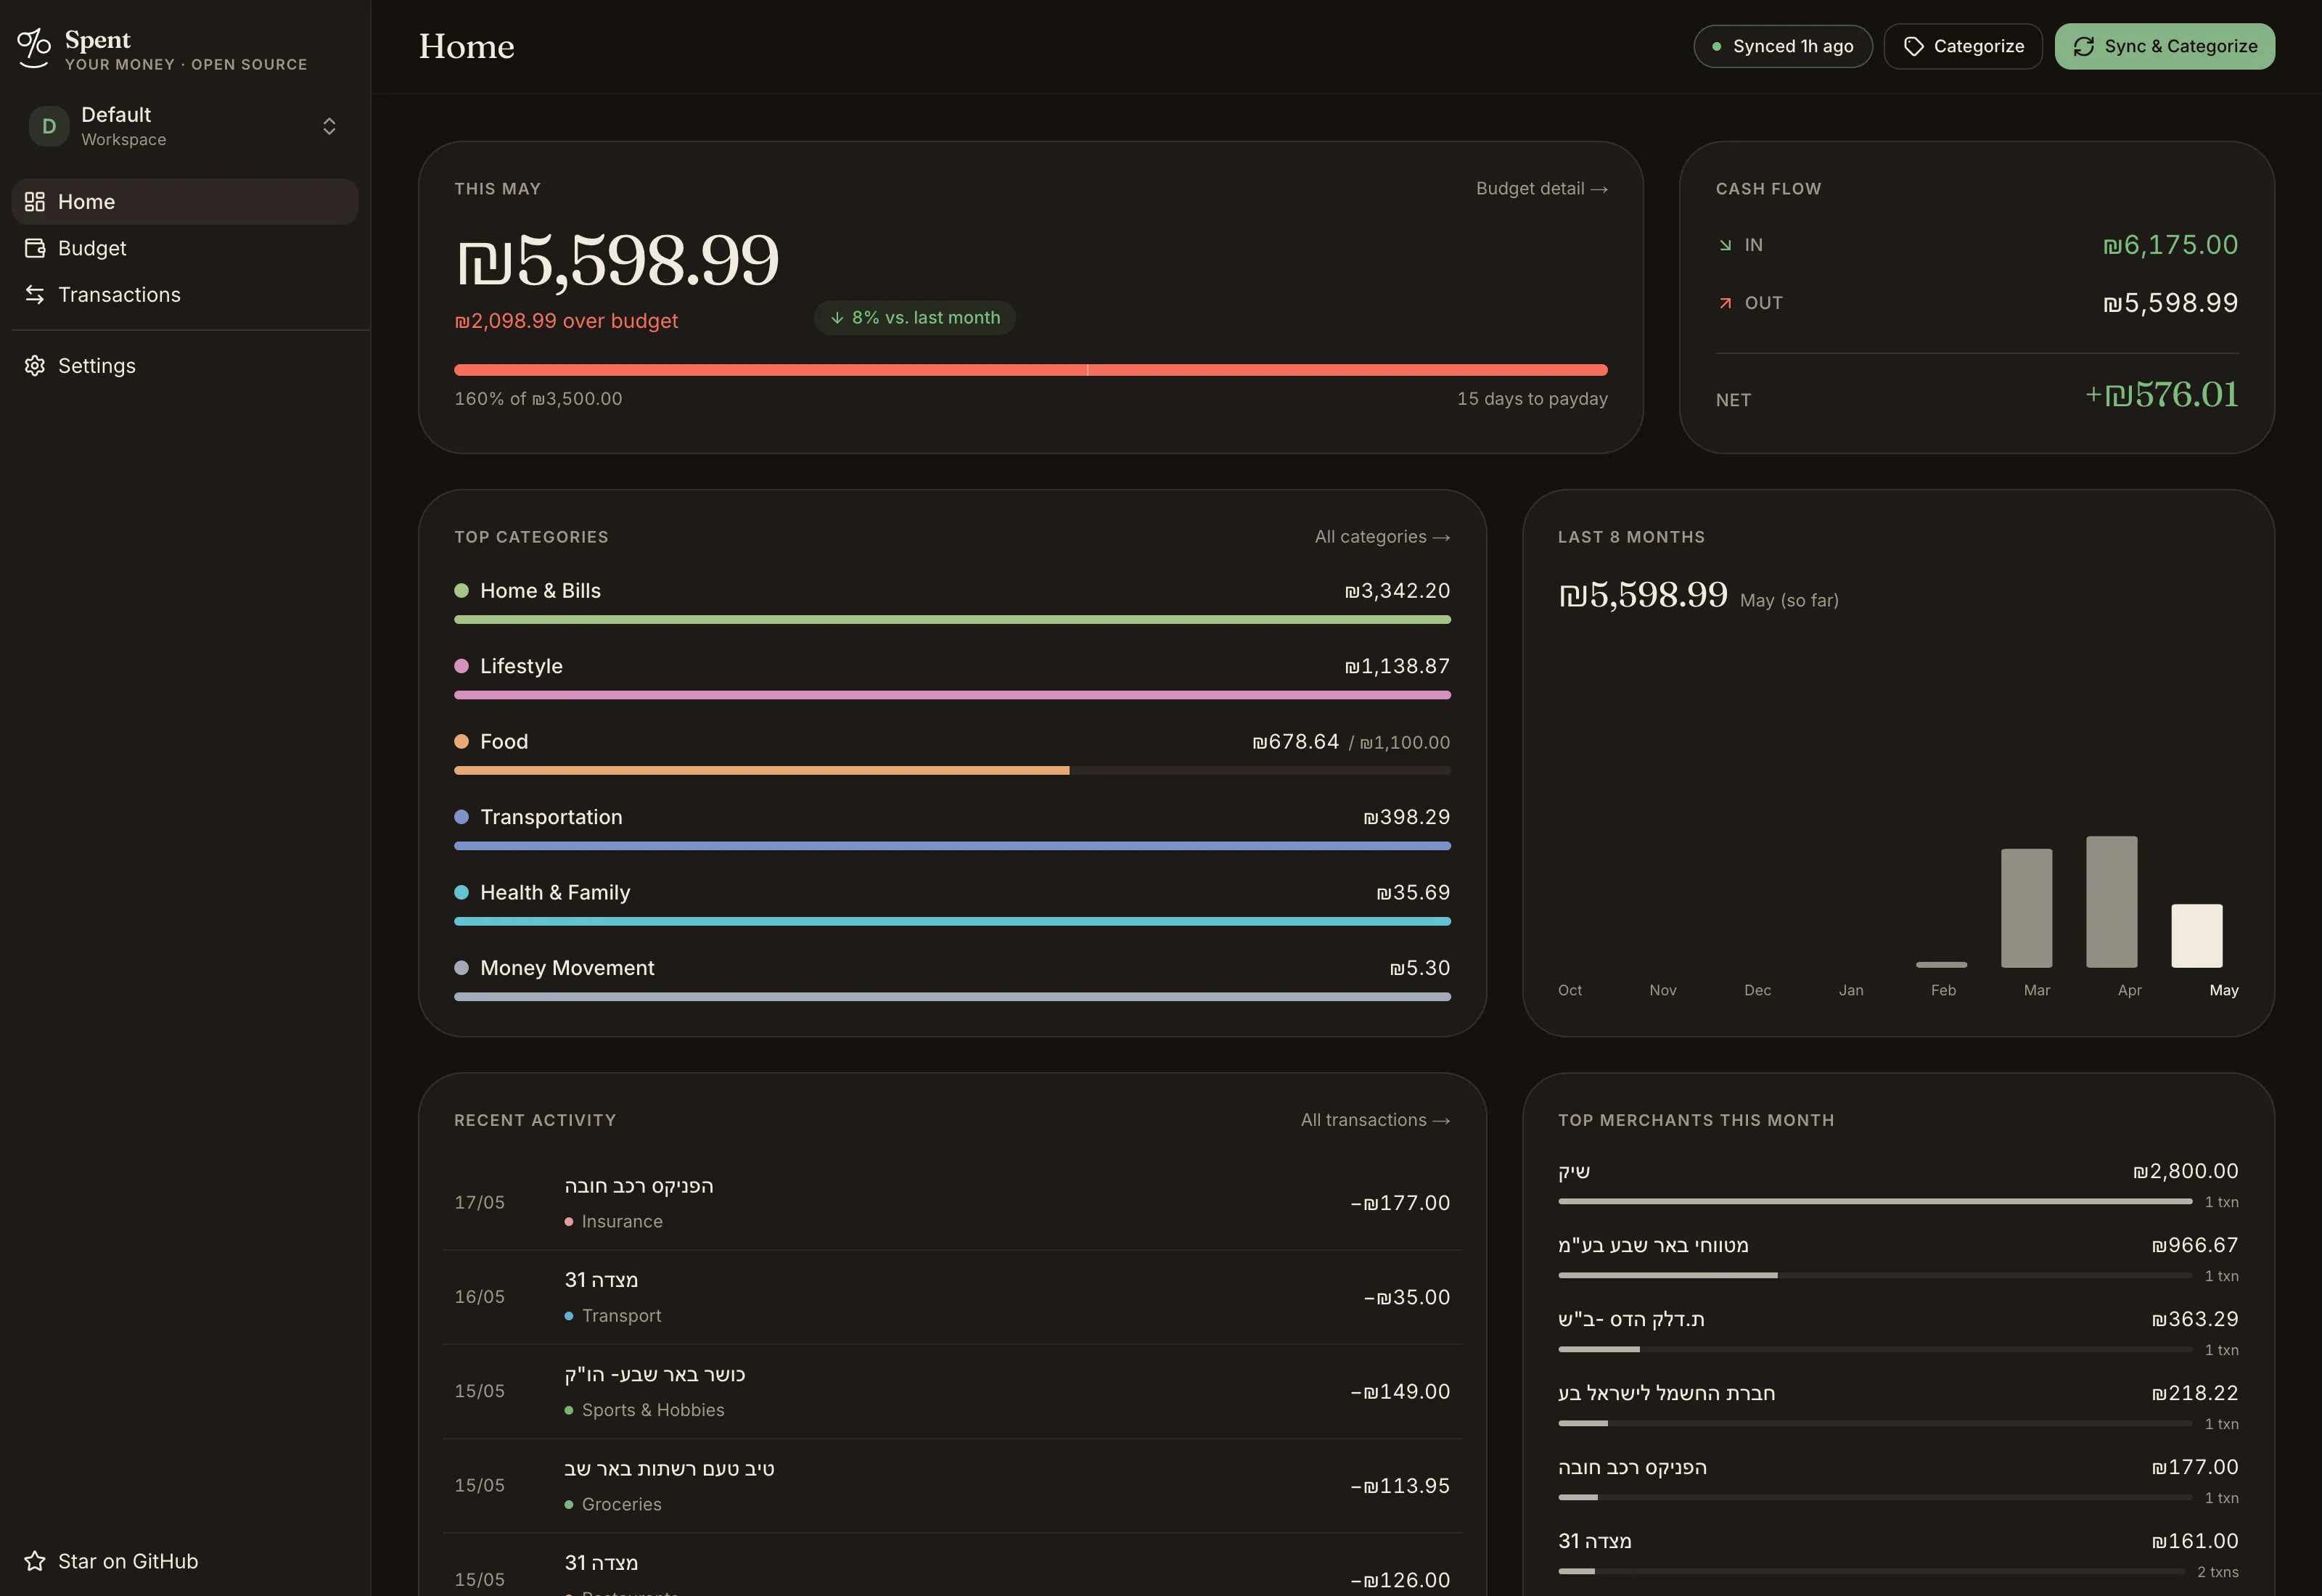
- Overview — monthly totals, “on track / heads-up / over” status pills, top spending categories.
- Transactions — chronological list with merchant, amount, category, date. Click a row to edit.
- Budget — your monthly budget and pacing card.
- Settings — banks, AI provider, sync schedule, preferences.
Syncing
Section titled “Syncing”By default, Spent syncs once a day at 03:00 local time. Change this in Settings → Sync schedule, or trigger a manual sync from the menubar or the dashboard.
A sync does three things, in order:
- Scrape — log into each connected bank and download new transactions.
- Deduplicate — compare against existing transactions using a content hash (so you don’t get duplicates if a bank shifts an old transaction’s identifier).
- Categorize — send uncategorized transactions to your chosen AI provider, in batches of 50.
If any step fails, the dashboard shows the error with a hint about what to do. See Troubleshooting for the common ones.
The menubar / tray app
Section titled “The menubar / tray app”On macOS the menubar app gives you four actions; on Windows it’s the same set in the system tray:
- Open — opens the dashboard in your default browser.
- Sync now — runs an immediate sync.
- Start / Stop service — pause Spent without uninstalling.
- Quit — quits the menubar (the background service keeps running).
The icon goes to a small animated dot while a sync is running.
Transactions
Section titled “Transactions”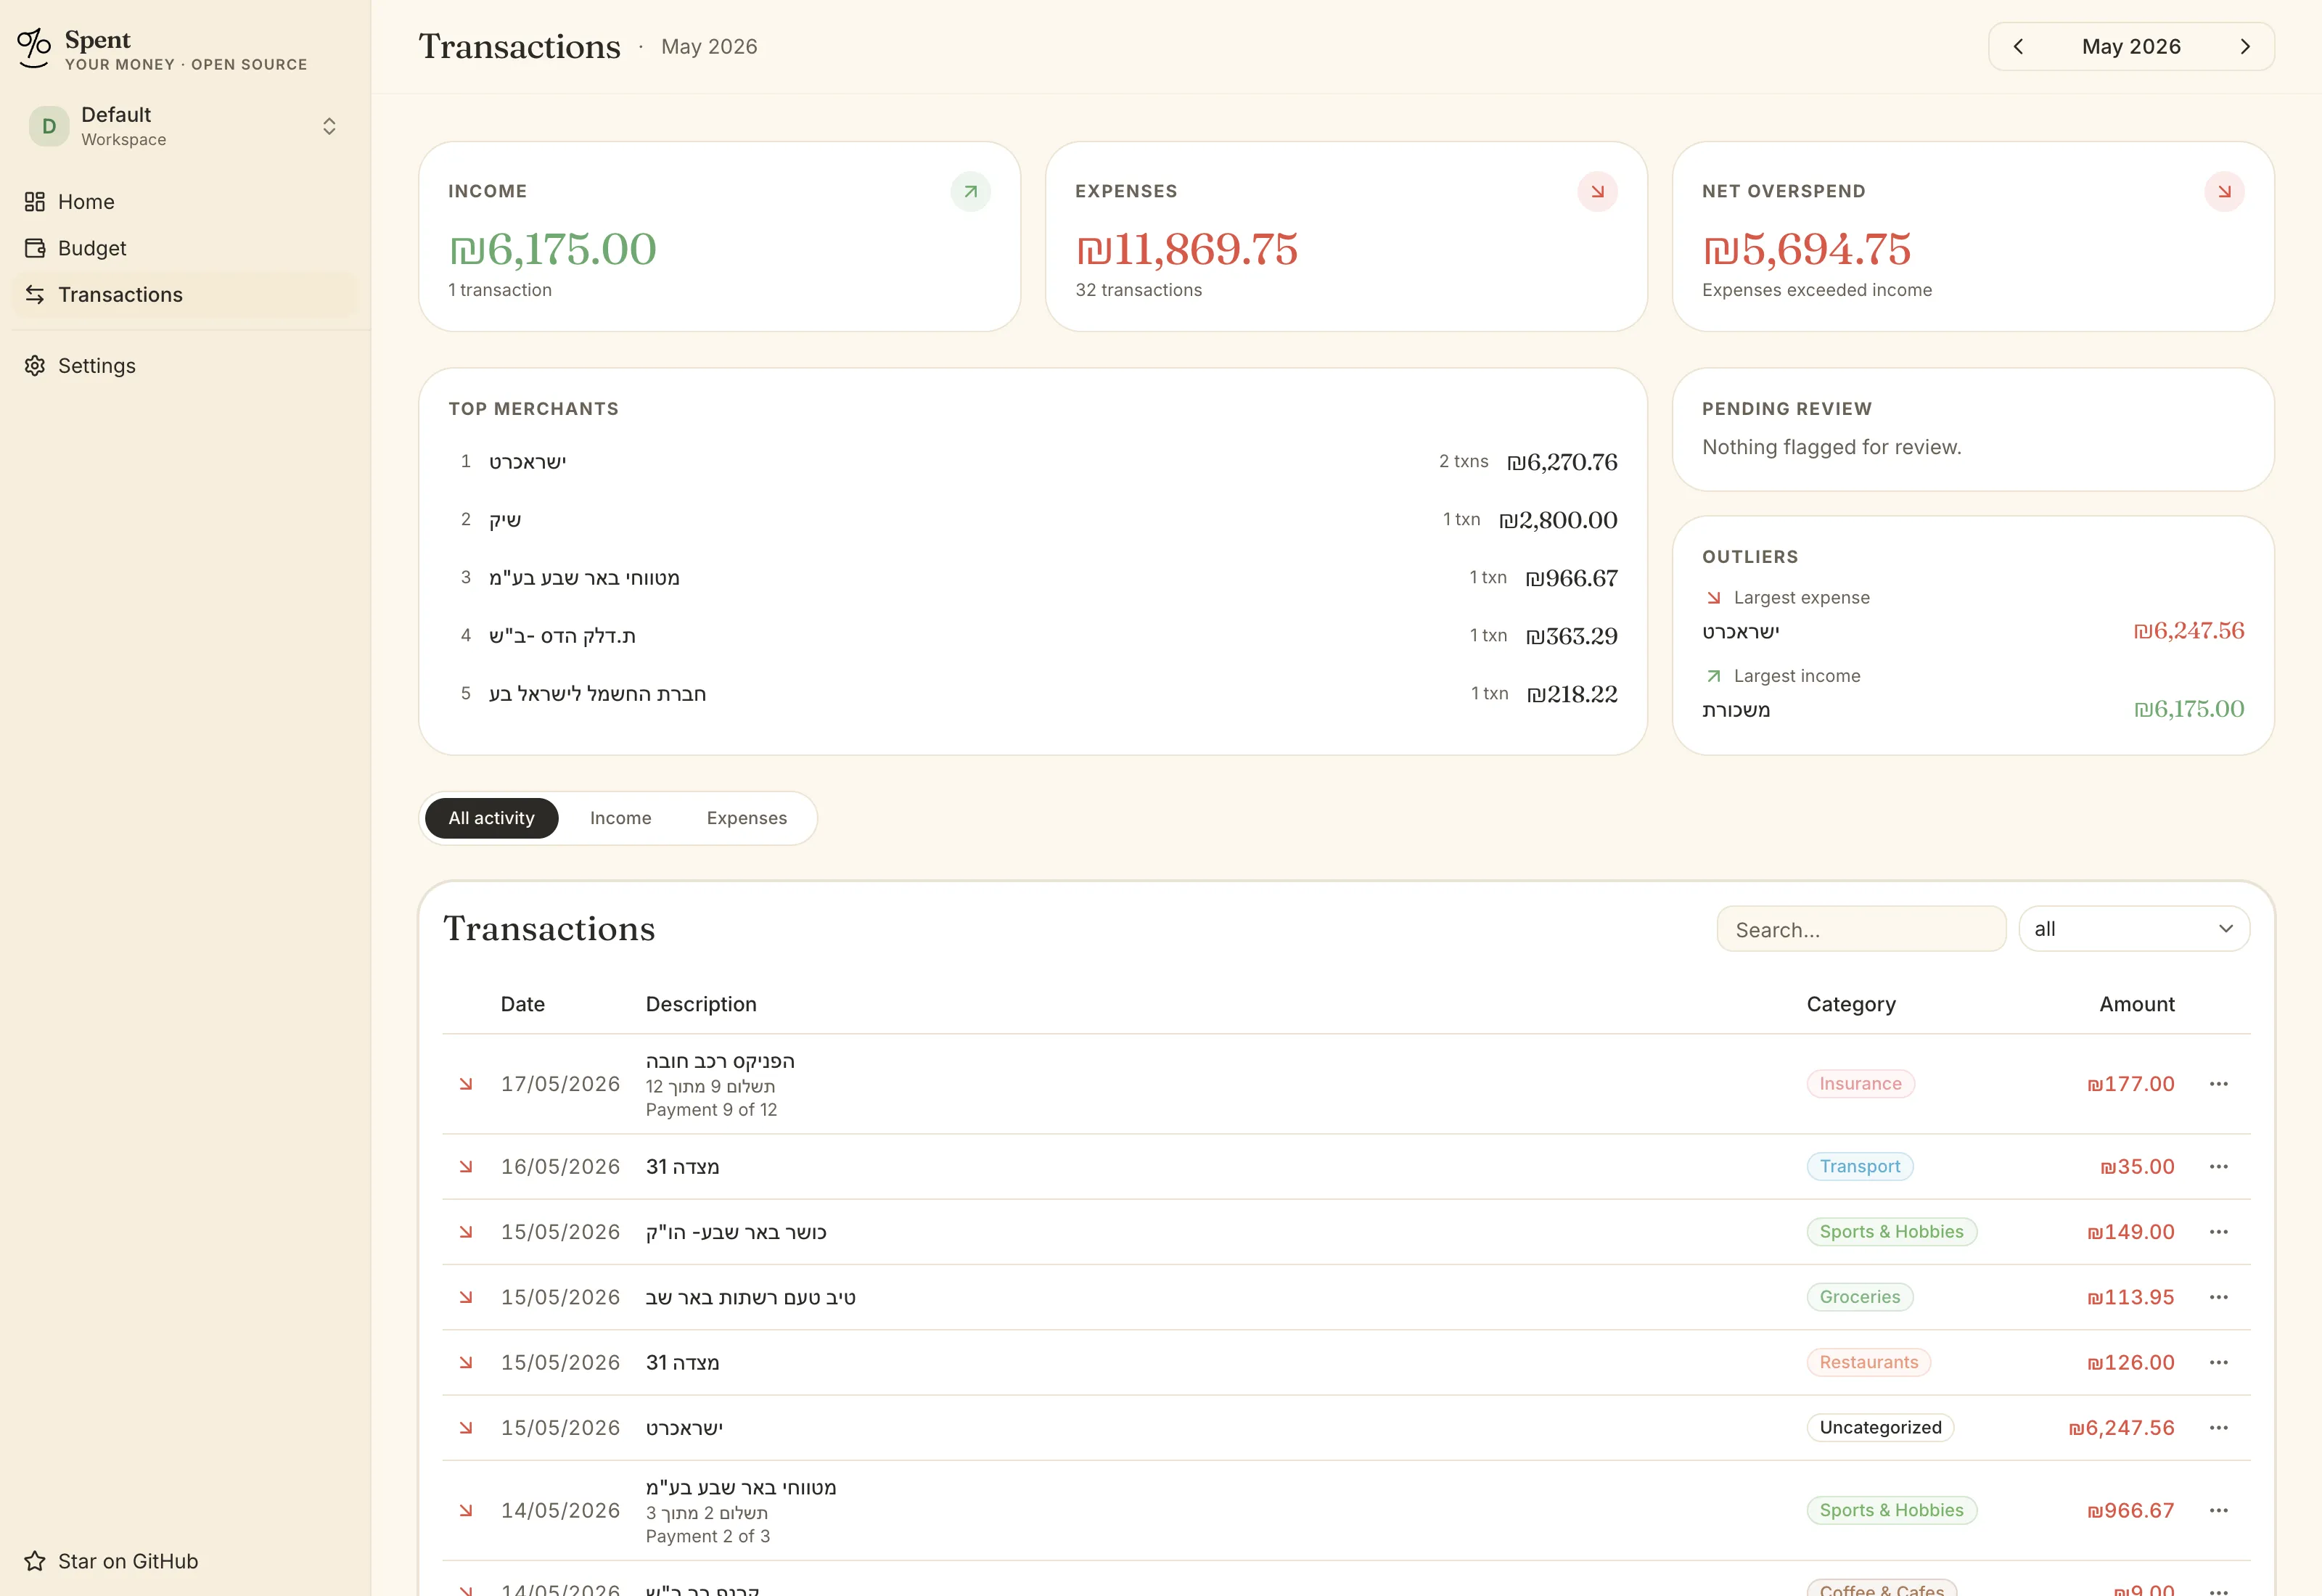
Click any category badge to change it. Spent remembers the correction and uses it the next time it sees a similar merchant — no re-training needed.
Dark mode
Section titled “Dark mode”Spent ships with a built-in dark theme. Toggle it from Settings → Preferences, or let it follow your OS.
Backups
Section titled “Backups”Spent stores everything in data/spent.db plus data/.encryption-key. To back up: copy those two files together. To restore on a new machine: drop them into the new install’s data/ folder before the first sync.
Any SQLite-friendly backup tool that handles WAL-mode databases works fine.
Next Categories & budgets